|
|
| |
|
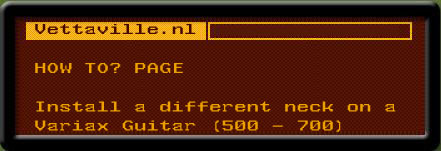
How to install a different neck on a Variax (not the acoustic) J-Bird,
(ION Forum member) gives a detailed explanation on how to replace a
neck on your Variax. Next, locate and center the neck in the neck pocket/body. (Use a small clamp with thin wooden shims on the clamping surfaces to hold the neck in place during this process.) To double-check if the neck is centered on the body, take a long straightedge and place it along the edge of the neck. Be sure that a portion of the straightedge is over the body at the bridge's location. Compare the two sides of the neck, and where the straightedge hangs over the bridge (i.e. the straightedge may be even with the outside of the E-string saddles, the outer saddle height screws, the outer edges of the bridge plate, etc.).
Drilling |
*Line 6®, Line 6 Inc., AX2, AxSys, BackTrack, BackTrack+Mic, Bass Floor POD®, Bass POD®, Bass POD® xt, Bass POD® xt Pro, Bass POD® xt Live, Constrictor™, Crunchtone™, Customtone, Duoverb, DL4™, DM4™, Echo Park™, Eight Ball, Filter Pro™, Flextone™, Floorboard, Floor POD®, Floor POD® Plus, FBV Express™, GearBox™, GearBox™ Plug-In, Guitarport™, GuitarPort® RiffTracker™, GuitarPort® xt, FM4™, HD147®, Jamware, JM4 Looper, LowDown, Liqua Flange™, M13, MM4™, MOD Pro, POD®, Pocket POD®, Pocket POD® Express, POD® FARM, POD® Studio, POD® xt, POD®xt Pro, POD® xt Live, POD® X3, POD® X3 Pro, POD® X3 Live, Rifftracker™, Roto Machine™, Space Chorus™, Spider™, Spider-Jam™, Spider-Valve™, ToneCore™, TonePort™, TubeTone, Ubermetal™, GX, UX1, UX2, UX8, Verbzilla™, Vetta™, Variax®, Variax® Acoustic, Variax® Workbench™ and Line 6 logos are trademarks of Line 6, Inc. RiffWorks, InstantDrummer™, Riffcaster, Rifflink and Sonoma Wire Works™ are trademarks of Sonoma Wire Works™. Atomic, Atomic Amps, LLC, Atomic Reactor 112, Atomic Reactor 112-50 and Atomic Reactor 212 are trademarks of Atomic Amps. Bose® and Bose® Personalized Amplification System™ are registered trademarks of Bose. T1 Tonematch, L1, All rights reserved. Vinny appears exclusively
for Vettaville.nl with courtesy of Vettaville Records Inc. All other product names used on this website are trademarks of their respective owners, which are in no way associated or affiliated with Vettaville.nl or Vettaville.net. These trademarks of other manufacturers are used solely to identify the products of those manufacturers to identify a certain tone or sound. Entire contents Copyright
© 2003-2008 Vettaville.nl. All Rights Reserved. Copyright © Vettaville.nl 2003-2008, All rights reserved. |